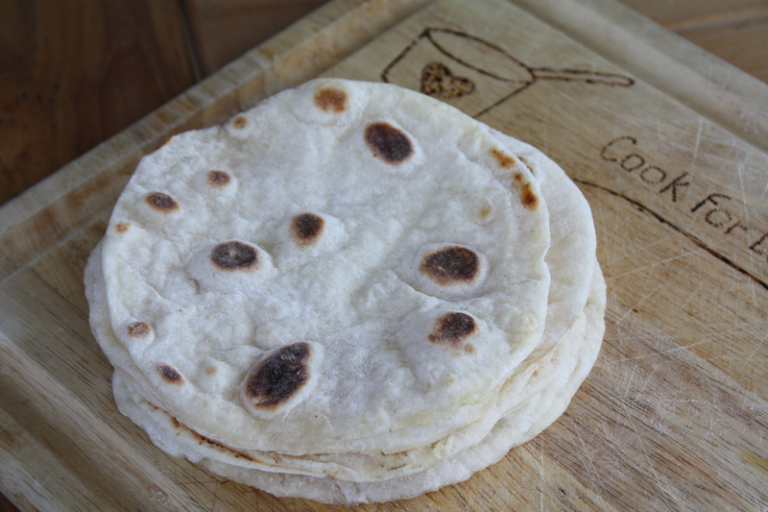
CFL’s multipurpose dough base keeps in the fridge in a lightly oiled ziploc bag for up to a week. This means you can pull out what you need (roughly .5 mg/gm) and make fresh rolls, breadsticks, pita, naan, tortillas and even pizza without it feeling like a ton of work. You can use either dough with this recipe, but I prefer the pizza dough. Pitas are a great way to make your basic salad sandwiches feel a little more special and are neater to eat than a wrap since the filing does not fall out. They are perfect with the phelafel recipe (see link in sidebar). These pitas freeze well and make delicious pita chips.
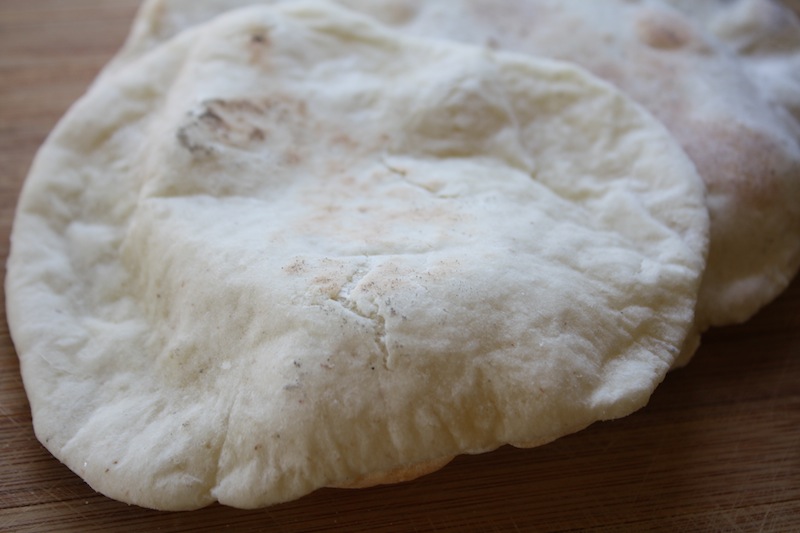
Pita Bread
CFL’s multipurpose dough base keeps in the fridge in a lightly oiled ziploc bag for up to a week. This means you can pull out what you need (roughly .5 mg/gm) and make fresh rolls, breadsticks, pita, naan, tortillas and even pizza without it feeling like a ton of work. You can use either dough with this recipe, but I prefer the pizza dough. Pitas are a great way to make your basic salad sandwiches feel a little more special and are neater to eat than a wrap since the filing does not fall out. They are perfect with the phelafel recipe (see link in sidebar). These pitas freeze well and make delicious pita chips.
Nutrition
Ingredients
Method
- Preheat your oven to 500 degrees. If you do not have a pizza stone in the oven, put a baking sheet upside down on the top shelf as the oven is preheating.
- Add a little wheat starch to your work area. Divide the dough into 12 equal balls (63 gm) and cover with plastic wrap.
- Press the ball down into a flat circle.
- On your work surface, add more wheat starch. Gently roll the dough into a 6 inch circle, adding more wheat starch as needed. They will be between 1/8th and 1/4 inch thick.
- Place the pita on parchment paper. Carefully put the pitas on top of the hot stone or baking sheet. (I either use a big pizza spatula or put on another upside down baking sheet and carefully slide).
- Bake until the pita inflates and forms a pocket (about four minutes). Flip pita over and count to 30. Remove the pita form the oven before they brown and crisp. (If your pita does not inflate to form a pocket and you have a gas stove top, turn the flame on high and put dough on top, sometimes this intense heat poofs it).
- Transfer warm pita to a napkin-lined basket and cover so bread stays soft. Repeat with the rest of the dough balls.